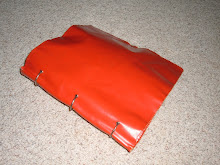
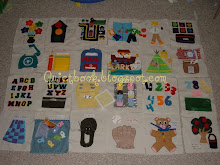
Figure out how many and which pages you want to include in your book. When you are positioning the felt and items on the page in preparation to sew, make sure to leave a little bit of room on the left or right margin (depending on whether this is a front page or a back page). You are going to have to leave a little more room on the left margin if it is a front page for the eyelet holes and a little more room on the right margin if it is a back page.
Also, when you cut the muslin, cut it doubled up, so that you have identical cut pieces of material to go on the front and back (this will make it easy when you are sewing the pieces together as they will be the same size). I put little 1F and 1B marks in the corners of the pages after I cut them out, to keep them in order. So 1F stood for page 1 front, and 1B stood for page 1 Back, and then the next 2 pages I cut out were 2F and 2B and so on.
Also, when you are positioning the felt, make sure you don't put it too close to the margins. You will want to leave about a 5/8" invisible frame around the page since this frame/margin will end up on the inside of the pages when you sew the pages together.
Wait until you've finished sewing the felt onto all the pages before you begin to sew the pages together back to back. This way, if you find you need to do a bit of switching around with the pages you can. I did this a bit with my pages and tried to position them so that different things like zippers were spread out from each other or there wasn't 2 button pages in a row.
When you do begin to sew the pages together, do so by placing the finished felt sides together so that the back of the pages are on the outside. Sew a 1/2"-5/8" seam around the margins, leaving about a 3-4" opening on one of the sides (I left this opening on the margin where the eyelet holes were). Turn the pages outside in, so the right sides now appear on the outside. Press with an iron on low heat, making sure to get the edges, nice and firm (I used a bit of ironing spray to get the pages stiff). When you are sure you don't need to make any changes to the pages, then you can sew the finishing stitch on the unfinished 3-4" opening you left. Just use a simple stitch with thread similar to the muslin color. The page is now ready for eyelets.
Before placing the eyelets. Get out a piece of notebook paper and use the 3-holes as a guide so that all of your pages have equally spaced out holes helping them to fit together nicely in the quiet book and binder rings. Place the paper over the page and with a pencil, trace the circles of the holes on the left handed margin (on the front side page). You will use these marks then for putting the eyelets in the pages. Once you've put the eyelets in (3 to a page), they are ready to go in your book!
Sunday, September 28, 2008
Subscribe to:
Post Comments (Atom)


.jpg)
11 comments:
Did you put anything between the muslin or are the pages sturdy enough? Also thanks for blogging this it has been very helpful I have wanted to make one of these for a while.
No I didn't put anything between the muslin. I know it seems kind of flimsy, but once you've sewn the pages together it is perfect and very sturdy. I've heard of people putting something in between, but I don't think it is necessary and I think it will make your book too thick in the end. Hope this helps! -Anna
(PS- sorry I couldn't reply directly to you- I didn't know your email address. Hopefully you'll come back and check these comments for your answer!)
Thanks for posting the response publicly, that was my question as well!
This is great !
NC
For the Fisherman.... did you laminate a picture? How did you attach it to the page?
Great job on the book! We are excited about finishing ours.
Good question Brenda. Actually, the fisherman page is the next one up for me to post instructions to, so I should have those up soon (sorry I am a bit slow with posting, this blog is kind of my "extra" blog and my young kiddos keep me quite busy).
Here's my short answer: I actually drew out that little fisherman guy on some white pellon. I used fine sharpie pens and colored him in. I actually had to make a couple different copies/tries on making him as I kept on messing up. I used the "Peter fishing" picture from Ann F. Pritt's quiet book as my template to pattern my drawing after. Here's a link to that template: http://www.theideadoor.com/PDF%20Files/Quiet%20Book/Quiet%20Book%20Pattern.pdf, and its page #10.
After coloring in the picture on the pellon material, I cut around the edges and sewed it right in onto my quiet book page. Hope that helps. Let me know if you need more info on this. Good luck and let me know how it all turns out!
I'm searching the internet on how to use the eyelets on fabric. Did you cut out the circles before you placed the eyelets in the pages or did you use some sort of tool... basically how do you put them in?
My eyelet tool has a sort of "hole punch" tool combined in one. Here is a link to one similar to the tool I have/use: http://www.walmart.com/catalog/product.do?product_id=10310660
Thank you it is a good help, now to make a quiet book is simple and easy with your guidance. Thank you
I am looking for idea to make books for graduating Kindergarden children 12 books in all. Any ideas. Need to get started so I have them done by May 2012. Sallyguenther@comcast.net
Post a Comment