
 This is a page I came up with after wanting to do a buckle, and also wanting to be able to teach my kids how to set the table correctly (this is something I'm ashamed to admit, but as a mom I sometimes still do wrong!). Other great buckle page ideas can be found here (from little handsbigwork.blogspot.com), and here (this is my little sister's book, scroll down to the super man buckle), and here (scroll down to the sixth picture down).
Here's my attempt at providing a template. It is all drawn to scale on a 8.5" x 11" sheet of paper, so if you are able to print it out at 100%, the sizes should be about right. The only thing not listed on the template is the napkin, which is pretty self explanitory- basically just a square folded up into a triangle.

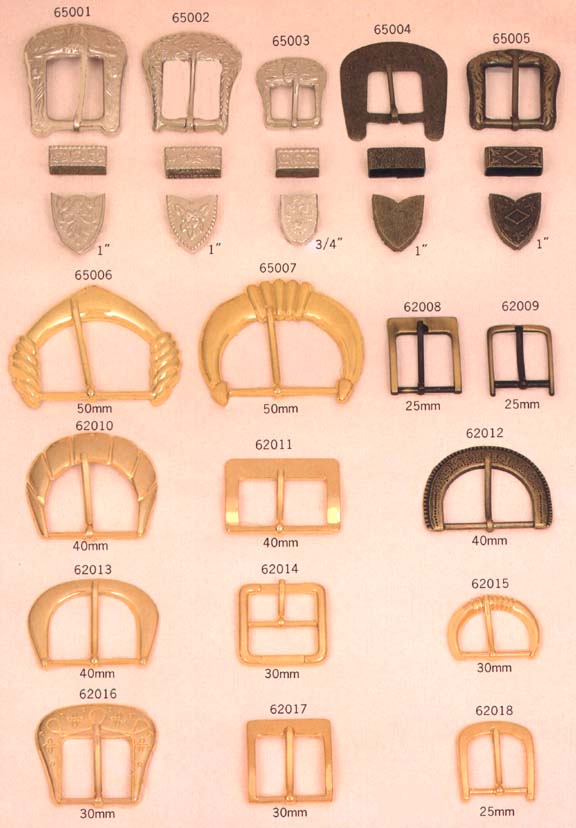
Items needed: One small buckle (I got mine at Joann's. They have a variety of shapes/sizes/in metal or plastic- look at all these fun buckles), about 8" x 12" rectangle of material for placemat and napkin (I picked a red gingham that would fray at the edges to give it a picnic feel), 6 small velcro pieces (I cut mine down from one large piece), brown felt for the basket, 5" x 5" square of white pellon for place settings, 5" x 5" square of white felt for backing on place settings, 4 eyelets, brown and/or white thread for sewing.
Teaches: buckling/unbuckling, how to set a table, imaginative play.
Cut out the following pieces: from you large rectangle of material, you are going to want to cut 2 pieces- one large 7.5" x 7.5" square for the napkin, and one large 7.5" x 4.25" rectangle for the placemat. Cut your velcro pieces down to size later (they'll need to match the corresponding place setting). Cut your brown felt into the following 6 picnic basket pieces: basket body (mine is about 5" wide, 3" tall, and sort of rounded on the edges), basket lid (cut it like a long oval that will cover the basket pocket- mine is 5" wide, 1.5" tall, basket handle (cut it so that it is a wide upside down U-shaped piece- mine is 4.5" wide, and 1" tall), eyelet strip (cut out a long rectangle strip- with one end cut evenly, and the other en cut to a point- my strip is .75" wide x 3.5" long), buckle strip (this is the piece that will attach/fold over onto to the buckle- mine is 1.75" wide x 3" long), belt loop (this is a small piece that folds around the buckle strip and is like a belt loop and will fold around your buckle strip and hold your eyelet strip into place when all buckled- mine is .5" tall x 2" wide). Cut out your 5 place settings: Plate, fork , spoon, knife, cup, from the white pellon (I first drew them out with a black sharpie on the white pellon before cutting, and arranged them on the place mat to make sure they fit properly), and cut out identical pieces from the white felt. To give you a general idea, my plate is about 2.75" wide in diameter, and my utensils are about 3" tall. I ended up trimming my place settings down after sewing them the double thickness, so at this point, while doing the initial cutting, you might want cut them out generously and leave some room on the borders beyond the black marker so your stitching won't get too close to the edge.
Directions: First, let's make those places settings (plate, fork, knife, spoon, glass).
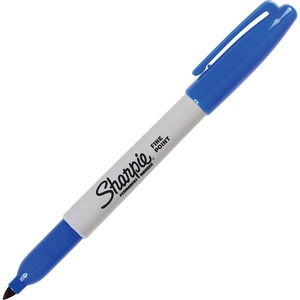
 I used sharpie pens to draw out mine. I used an ultra fine black sharpie (permanent marker) for drawing the utensils and then used a colored blue sharpie for coloring in the plate and water in the glass. Sharpies work great on the pellon as they don't bleed. Before you sew the white pelon to the white felt (to make the place settings double thickness), you are going to want to sew on the velcro to the white felt half. I used the soft/non sticky 1/2 of the velcro for this (so the placesettings wouldn't stick to the inside of the picnic basket) and just cut out small, thin pieces of velcro to match the specific place setting (see picture).
  Sew those into place onto the white felt pieces, and then sew the white pellon (drawn on) pieces to the felt/velcro pieces. After sewing those together to make them a double thickness, trim the edges so that they lie close to the stitch.
 Now, for the napkin. This is pretty simple, just take your 7.5" x 7.5" square and fold over the edges and iron, and then stitch to provide a finished edge on all 4 edges. Then, I folded my napkin into a quarter (so it was triangle shaped), and sewed on a piece of velcro to it, so that it would stick to the place mat too. Because I applied the velcro to the napkin after folding it, it makes it so that you can't open the napkin completely, but it stays in a nice little triangle this way and makes it easy to use when setting the table. After applying the velcro to the napkin, I folded the napkin one more time and ironed/starched it (so it became a smaller triangle and fits nicely on the place mat).
 For the placemat, take the 7.5" x 4.25" rectangle and on the top and bottom edges of the rectangle, and fold them over and top stitch on top. I wanted to leave my side edges unfinished (frayed) to give it a picnic look, so I didn't fold those edges over, but rather frayed them and then top stitched where the fray meets the material so the fraying would stop. Then you are going to want to apply your other 1/2 of the velcro pieces to the place mat. Play around with the place settings and napkins and find out where they fit best. Then pin the velcro pieces into place and sew them to the place mat material.
 Now you are ready to sew the place mat to the quiet book page. My place mat takes up the top half of the page. You may want to sort of position your basket on the bottom half, to make sure everything will fit okay (make sure to leave edges for the borders!). Once you've sewn the place mat on, you are ready to start working on the picnic basket!
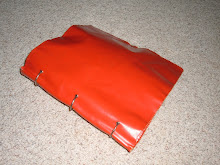
Now, to build this picnic basket! First thing you are going to want to do is place the brown cut felt pieces together at the bottom of the page to sort of build the basket. This will help you know where to position the first piece you are going to sew on- the basket body. Before you sew on the basket body to the muslin quiet book page, you are going to want to top stitch just the top edge of the basket body. Since you sew this on like a pocket, it is this top edge that will not be sewn onto the page and will be tugged on the most. Once you've top stitched that, lay the basket body onto the page, and sew down the sides and across the bottom so you make a pocket.
 Then you are going to want to top stitch the bottom half of the wide ovaled basket lid (since the top half will be sewn to the page it doesn't need top stitching). Then place the basket lid over the basket body, so that it's bottom rim comes down over the basket body about 1/3". Sew it into place by just sewing the top half of it to the muslin quiet book page. I for no particular reason (probably just ran out of one of the colors or something), used 2 different colors of thread here. If you look closely, you can see my white thread is the top stitching, and the brown thread is where I sewed the pieces to the muslin quiet book page.
 Next you are going to want to sew your basket handle to the page. I just placed it on top of the oval lid and stitched it twice back and forth into place.
 Now for the buckle. Take your eyelet strip piece of felt, and apply four eyelets to it. On the pointed edge, I took a little bit of pellon (you could use any sort of reinforcement material here) and sewed it to the point so the point was sturdier (and would feed through the buckle easier). Place the eyelet strip now so the straight (not pointed) edge is in line with the top of the oval lid and sew that into place. I went back and forth on the sewing machine here with this stitch so that it was reinforced well to the felt/page since I knew it would get tugged on.
Next, you are going to want to apply your buckle to the buckle strip of felt. In order to do this, I had to loop the top edge over the buckle by making a small hole for the buckle tongue (the pin-like piece that feeds through the eyelets when the buckle is fastened) and then sewing the loop tightly into place around the base of the buckle so it becomes part of the buckle strip. I also reinforced my stitching here. Then you are going to want to take your belt loop, fold it into a ring shape and stitch it together, so it stays in a ring/loop. Slide this loop over the buckle strip you just built. Then sew the buckle strip onto the muslin quiet book page by placing it so that it's bottom edge (the edge without the buckle) lies flat with the bottom edge of the basket body. Before sewing this piece into place, you may have to play around withe buckle a bit and make sure it lines up well/attaches well with the eyelet strip that hangs down.
Lastly, if you want to put a text box on the page like mine, take some pellon and with permanent markers right something cute like "unpack the picnic basket and set the table", "set up a picnic!" or "a tisket a tasket, can you unbuckle my basket?"
Happy picnicking!
And up next is the "Numbers Page", so stay tuned! We're almost done with the 24 pages!!!


.jpg)
6 comments:
Oooh...I really like this one. I may have to use it. ANd, in case I never responded, pretty sure I didn't, you are more than welcome to link to me. You do awesome work! Thanks for sharing your talent:)
Anna- This is SUCH a cute page with a super creative but perfect way to add in the buckle!! I wish I would have thought have that beforehand too, but I just wanted to let you know that I finally finished!! Woo hoo!! Those 3 months were totally worth it! Thanks so much for sharing all of your help, amazing ideas, and step-by-step guides on how to make the pages so stinkin' cute! The finished work is posted on my blog at jsquaredplusk.blogspot.com! You are such a talented woman and wonderful mom! Thanks again for everything!! :)
so cute. I was trying to think of a good way to do a place setting idea. Your's is way better!
So I'm just starting a Quiet Book and found this site - LOVE IT! thanks for all the hard work you have done! I'm amazed! and I def need the step-by-step directions!
I am just beginning a quiet book and I'm using your blog as my guide. My husband and I are in the process of adopting and I plan on doing a couple of pages/month to help make the time fly by! ;)
Thank you so much for your incredibly clear instructions and patterns! :)
Thank you, thats very interesting information. I need to share with my friends.
Post a Comment